Laser Warning Signs: Requirements, Design Standards & Best Practices for LSOs
Laser Warning Signs: How to Design, Place, and Use Them the Right Way
If you work with Class 3B or Class 4 lasers long enough, you learn two things very quickly:
- People walk into places they shouldn’t.
- A good warning sign can stop that from happening.
As the Laser Safety Officer (LSO), you’re not just “the laser person.” You’re the one ultimately responsible for making sure that anyone approaching a laser-controlled area knows what they’re walking into and what they need to do to stay safe. Signs play a huge role in that.
This article walks through how to think about laser safety signs from an LSO’s perspective: what’s legally and technically required, what actually works in the real world, and how laser class and environment drive your choices.
1. What a Laser Warning Sign Must Do
An effective laser warning sign has two jobs:
- Get noticed
- Tell people exactly how dangerous the area is and what to do about it
That sounds simple, but it’s where a lot of facilities fall short. You’ll see faded labels, signs hidden behind open doors, or generic “Laser In Use” stickers with no class, wavelength, or PPE guidance.
From a standards standpoint, ANSI Z136.1 and Z136.3 are clear: laser-controlled areas must be labeled with signs that show the signal word, laser class, hazard message, and key laser parameters like wavelength and maximum output.
At a bare minimum, a compliant sign for a controlled area with a Class 3B or 4 laser should include:
- Signal word (Danger / Warning / Caution)
- “Laser Radiation” plus a hazard statement
- Laser class (e.g., “Class 4 Laser Product”)
- Wavelength and maximum output (and pulse duration if pulsed)
- Any critical instructions (e.g., “Eye Protection Required”)
If one of those is missing, it’s time to fix it.
2. Signal Words and Colors: Danger vs Warning vs Caution
The language and color on the sign are not just “style”; they are tightly controlled by ANSI and OSHA conventions.
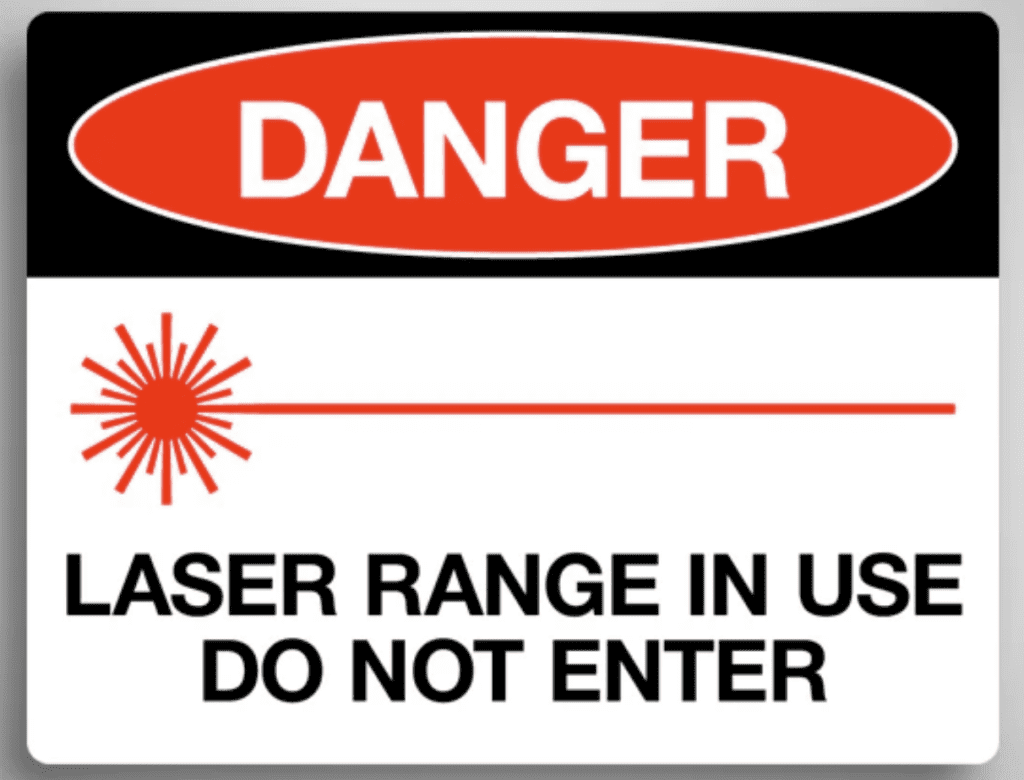
Danger – Red
- Use it for: Class 4 lasers with exposed or potentially exposed beams, especially when free-space propagation is possible.
- Meaning: Immediate hazard that can cause serious injury or death.
- Example text:
DANGER
LASER RADIATION – AVOID EYE OR SKIN EXPOSURE TO DIRECT OR SCATTERED RADIATION
CLASS 4 LASER PRODUCT
According to healthcare LSO guidance, “Danger” is reserved for the highest hazard situations—typically Class 4 laser areas with accessible beams.
Warning – Orange
- Use it for: Class 3B and some Class 3R systems where exposure can exceed MPE but isn’t as catastrophic as a typical Class 4 scenario.
- Meaning: Serious hazard, but not quite at “immediate death” level.
- Example text:
WARNING
LASER RADIATION – AVOID DIRECT EXPOSURE TO BEAM
CLASS 3B LASER PRODUCT
ANSI Z136 and OSHA both recognize “Warning” as the mid-tier signal word between Danger and Caution.
Caution – Yellow
- Use it for: Class 2, 2M, and 3R systems that can cause injury but normally rely on the aversion response or limited power.
- Meaning: Potential hazard; you still need to behave carefully even if the risk is lower.
- Example text:
CAUTION
LASER RADIATION – DO NOT STARE INTO BEAM
CLASS 2 LASER PRODUCT
The healthcare laser safety curriculum explicitly ties “Caution” to Class 2, 2M, and 3R systems, where irradiance is below MPE or only slightly above, but careless behavior could still cause harm.
3. What Information Belongs on the Sign?
ANSI Z136.1 and Z136.3 both specify the essential content for a laser warning sign. The healthcare LSO curriculum lays this out very clearly:
Your sign should include, when applicable:
- Signal word: Danger / Warning / Caution
- Header: “LASER RADIATION”
- Hazard phrase, class-dependent:
- Class 2: “Do not stare into beam”
- Class 2M: “Do not stare into beam or view with optical instruments”
- Class 3R & 3B: “Avoid direct exposure to beam”
- Class 4: “Avoid eye or skin exposure to direct or scattered radiation”
- Laser type (e.g., Nd:YAG, CO₂, Diode)
- Wavelength(s)
- Pulse duration (if pulsed)
- Maximum output power/energy
- Laser hazard classification (Class 2, 3B, 4, etc.)
This isn’t overkill—this is exactly what someone doing hazard evaluation or an OSHA inspector will look for.
4. How Laser Class Drives Sign Requirements
Laser class isn’t just a label on the product; it directly dictates how aggressive your signage and access controls need to be.
Class 1, 1M, and 1C
- Considered non-hazardous under normal operation.
- Generally no special area warning signs required.
- Exception: If a Class 3B or 4 laser is embedded and accessible during service or with housings removed, then your service condition requires appropriate warning signs and controls.
Class 2 and 2M
- Eye hazard if someone deliberately stares into the beam or uses optical aids.
- Require Caution signage where people might be exposed.
- Typical applications: barcode scanners, low-power alignment lasers.
Class 3R
- Low-to-moderate risk; hazardous for direct intrabeam viewing, especially with optical aids.
- Usually Caution, sometimes Warning, depending on irradiance and local policy.
- Common example: many laser pointers.
Class 3B
- Immediate eye hazard; can be a skin hazard at close range.
- Typically do not produce hazardous diffuse reflections, but direct and specular exposures are dangerous.
- Require Warning signs at all entry points to the laser-controlled area.
Class 4
- Eye and skin hazards from direct and scattered beams.
- Can ignite materials, produce plasma, and generate laser-generated air contaminants (LGAC).
- Require Danger signs and robust access control at all entry points to the Nominal Hazard Zone (NHZ) or Laser Treatment Control Area (LTCA).
If you’re not matching your signage to the actual hazard class and beam access conditions, you’re out of alignment with ANSI Z136 and OSHA’s expectations.
5. Where Signs Must Go: Placement and Integration
Standards and training materials are very consistent on this: signs need to be where people make decisions about entering or staying in a space.
At Entrances to Controlled Areas
Healthcare and industrial LSO guidance both require that controlled areas (LTCA or NHZ) have warning signs posted at all entrances whenever the laser is in use. That includes:
- Doors to laser rooms
- Access panels large enough for personnel entry
- Curtains or barriers serving as an “entryway”
These signs should be at eye level, unobstructed, and visible from the approach side.
Near the Equipment Itself
For complex rooms or shared spaces, it’s often smart to repeat signage:
- On the equipment housing
- On adjacent walls near the beam path
- Near viewing windows or ports (with their optical density info)
Manufacturers are required to label the product itself with a classification and warning logotype; your job is to extend that to the room-level and process-level signage.
During Alignment, Maintenance, and Service
Most laser incidents happen during alignment or servicing when interlocks are bypassed and housings are open.
Best practice:
- Create temporary laser-controlled areas with clearly posted warning signs whenever interlocks are defeated.
- Make sure those signs reflect the embedded class (often 3B or 4), not the “normal use” class of the finished device.
- Include explicit instructions such as “INTERLOCKS BYPASSED – ALIGNMENT IN PROGRESS – EYE PROTECTION REQUIRED.”
ANSI Z136.1 and the OSHA Technical Manual both support the idea of temporary controlled areas with proper signage when service conditions increase risk.
6. Status Lights and Linked Warning Systems
Your signage doesn’t have to be purely passive.
The healthcare LSO curriculum specifically recommends status-indicating warning systems that tie directly into the laser power supply:
- Green – Safe to enter; laser is off.
- Yellow – Caution; laser system powered but beam not radiating yet.
- Red – Do not enter; laser beam is radiating.
These indicators should:
- Be mounted at the entrance to the controlled area.
- Change state automatically with the laser system—no extra switch for the operator to “forget.”
- Ideally be accompanied by a flashing light or audible alarm when the laser is firing.
From a safety program standpoint, tying signs and warnings electrically into interlocks and EMO (Emergency Machine Off) circuits is one of the easiest ways to reduce reliance on memory and “good habits.”
7. Materials and Durability: Don’t Let Your Signs Fail Before You Do
Technically perfect wording won’t help if the sign is sun-bleached, peeling, or unreadable.
Common Robust Materials
- Aluminum – Lightweight, corrosion-resistant, excellent for outdoor or harsh industrial environments.
- Polycarbonate – Impact-resistant and tolerant of many chemicals; good for lab and industrial spaces.
- Acrylic – Clear and visually clean, but more brittle; best for low-impact indoor use.
From a safety-program perspective, look for:
- UV-resistant inks or coatings to prevent fading
- Scratch-resistant surfaces
- Fire-resistant backing or substrates in Class 4 environments where ignition is a concern
OSHA and ANSI don’t tell you “use aluminum” vs “use plastic,” but they do expect signs to remain legible and functional for the life of the hazard. As LSO, you should be inspecting them during your regular audits.
8. Tying Signs to the NHZ and LTCA
Your warning signs should reflect not just that there’s a laser “somewhere nearby,” but where the Nominal Hazard Zone (NHZ) and Laser Treatment Control Area (LTCA) actually begin.
- The NHZ is the region where direct, reflected, or scattered radiation can exceed MPE.
- In many cases, the simplest and safest approach is to define the entire room as the NHZ and label all entrances accordingly.
- If only part of a large room is hazardous (e.g., an LTCA bay inside an OR), the boundaries must be clearly defined with barriers, curtains, and signs at the LTCA boundary.
In other words: your signage is one of the tools that defines the boundary between “safe” and “controlled.”
9. Common Mistakes (and Easy Fixes)
Here are a few patterns I see a lot, along with what the standards say about them:
1. Generic “Laser In Use” With No Class or Parameters
Problem: Not compliant; fails to communicate risk level.
Fix: Update signs to include class, wavelength, and appropriate hazard statement.
2. Wrong Signal Word
For example, using “Caution” on a Class 4 surgical laser room.
Problem: Understates risk and conflicts with ANSI guidance.
Fix: Use Danger for Class 4 with exposed beams; Warning for Class 3B; Caution for lower classes as appropriate.
3. Hidden or Obstructed Signs
Behind doors, equipment, posters, or cabinets.
Fix: Reposition at eye level in the line of approach, duplicate signs if needed.
4. No Temporary Signage During Alignment or Service
Problem: Risk spikes during those operations, but the room looks “normal.”
Solution: Have a set of clearly worded, movable signs for alignment/maintenance conditions, especially when interlocks are bypassed.
5. Signs Not Updated After System Modifications
Problem: If the laser’s output, wavelength, or class changes, but the door sign still shows the old numbers, you’ve got an issue.
Solution: Make “update signage” part of your modification and hazard re-evaluation checklist as LSO.
10. Quick LSO Checklist for Laser Warning Signs
When you walk up to a laser-controlled area, ask yourself:
- Is there a sign at every entrance?
- If not, you’re out of compliance.
- Does the signal word match the laser class and access conditions?
- Danger: Class 4 with accessible beam
- Warning: Class 3B (and some 3R)
- Caution: Class 2, 2M, 3R
- Does the sign list:
- “Laser Radiation” + appropriate hazard phrase?
- Class, wavelength, and maximum output?
- Any PPE or access restrictions?
- Are signs legible and unobstructed?
- No fading, no damage, no clutter hiding them.
- Are status indicators (lights/alarms) present and working for Class 3B/4?
- Green / Yellow / Red system, or equivalent, tied to laser power state.
- If maintenance or alignment is happening, is there temporary signage reflecting the actual risk?
- Especially if interlocks are defeated or housings removed.
If you can’t say “yes” to all of those, you’ve found an opportunity to improve your laser safety program.
Final Thoughts
Laser warning signs are one of the simplest, cheapest control measures you’ll ever implement—but they’re also some of the most visible and most scrutinized. They tie together your hazard evaluation, classification, engineering controls, and training into a single message on the wall.
As LSO, don’t treat signs as an afterthought or a one-time purchase. Treat them as living parts of your control system—reviewed, updated, and integrated into how your facility actually uses lasers day to day.
If you’d like, next we can build a set of sign templates by class and application (industrial vs healthcare vs research) that you can drop straight into your facility.